Guide: Automate Packing Slip PDF Generation with Zapier
This guide will show you how to automatically generate packing slip PDFs. In this example will use new paid Shopify orders as the automation trigger. You can swap out the Shopify trigger with your own automation requirement, the principal remains the same.

Here is the packing slip that we will be generating with Zapier. Be sure to check out our other ready to go templates.

Prerequisites
-
You must have a Docamatic account. Docamatic free plan allows 30 documents per month. You can create an account here .
-
You must have Zapier account. Zapier free plan allows 100 tasks per month.
-
You must have a Shopify account.
Create the Zap, Step by Step
- Sign into Zapier and click the Create Zap button.

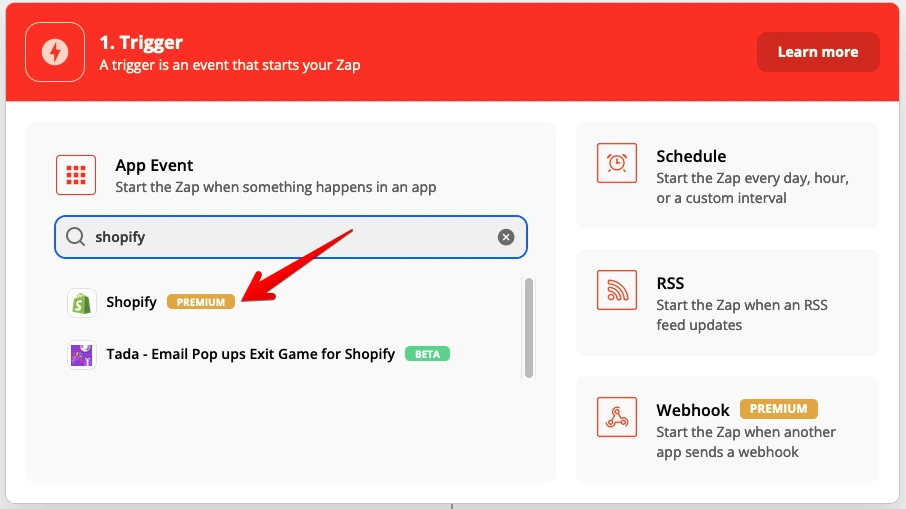
- Search for "shopify" and then click on Shopify.
- Select New Paid Order from the "Trigger Event" drop down list.
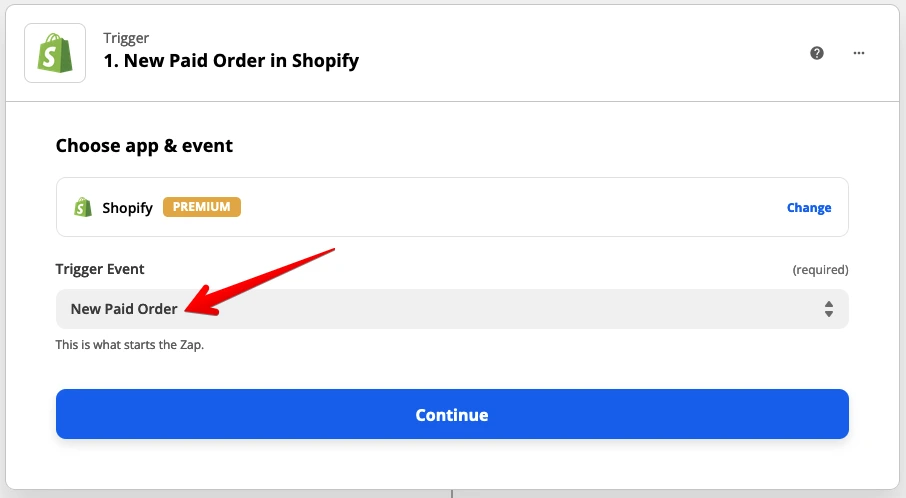
- Click Continue. Now we need to connect to our Shopify account. Click the Sign in to Shopify button and connect your Shopfy account.

- Next, we want to set up the trigger for our Zap. Basicially we are defining the criteria that will initate this automation. In our example, I want to generate packing slips for new orders that have been paid, so select paid from the "Payment Status" drop down. After you have configured the trigger, click Continue.

- The trigger is ready to test! Click Test trigger. If there are any paid orders available in your Shopify store, your test should be successful. If it fails, make sure there is an order that matches your trigger criteria. Click Continue to finish setting up the trigger.

- We have successfully defined the trigger. Now we need to define the "action" (what happens when a matching Shopify order is found). We want to generate a PDF, so search for Docamatic.

- From the "Action Event" drop down list, select Generate a PDF and then click Continue.

-
Next, we need to connect Zapier up with your Docamatic account. Click the Sign into Docamatic button.
-
Another window will appear, prompting for your Docamatic API key. Copy your Docamatic API key from the Docamatic dashboard, and paste into the text field. Click the Yes, continue button. Your docamatic account is now connected with Zapier. Click Continue.

-
Now that we have connected our Docamatic account we can start setting up the "Action". Click on the Template field and select packing_slip1.
-
Next we need to start matching the data from Shopify with the packing slip template fields. Work your way through the template fields, either mapping the value from Shopify or entering a fixed text value.

- Next we need to match the Line Items from our Shopify order with the packing slip template (see the "items" element in the example JSON for the template). Add 4 lines: "description", "sku", "barcode" and "quantity". Map them with the corresponding Shopify line item attributes.

Please note, Zapier is not exposing Shopify line item image URLs. If you want to insert Shopify line item images you may need to add an intermediary step.
-
The PDF Paper format (size) is defaulted to "Letter". If you require a different paper size, please select it from the Format drop down.
-
Scroll down and Click Continue. Next we can check that the action is working ok. Click Test & Continue.

That's it! Your Zap has been created. You have created a Zap that automatically generates packing slips from new paid orders in Shopify. You may want to add further steps to your zap to further automate your workflow. e.g. upload to Google Drive, send it via email etc.
Return to blog